Kapha is one of the three Ayurvedic Doshas, or constitutions. The Kapha season is late Winter through early Spring (depending on where you’re at in the world).
Supportive qualities of Kapha: compassionate, sweet, forgiving, warm, ‘huggers’, loving, stable strong stamina and endurance, grounded
Symptoms of imbalanced Kapha: clingy, hoarder, people-pleasing, unable to say ‘no’, lethargic, depressed, complacent, feeling stuck or unmotivated, sinus congestion, water retention, bloating, swelling, excess phlegm, cysts.
Following a daily routine that includes waking up by 6a, drinking hot lemon water, eating breakfast around 8a, lunch (biggest meal) at noon, light dinner no later than 7p
Affirmation- My true self is free
Warm colors- red, orange, yellow
Stones- garnet, fire opal, tiger eye, carnelian. Or amethyst which is tridoshic
Pranayama- Right Nostril Breathing (in right, out left)
Mudra- Prana Mudra (like the Peace sign, extend index and middle so they’re together, thumb covering the tips of ring and little finger) to increase vitality and strengthen digestion
Strong exercise, vigorous vinyasa with lots of movement and flow, back bends, sun salutations, standing poses, half moon, headstands, arm balances, and short savasana (don’t be afraid to sweat!)
Listening to upbeat music
Dry sauna
Avoiding a luxurious, leisurely lifestyle
Emotional housekeeping, introspective activities like journaling and meditation
Decluttering your physical space
Avoiding naps
Meditating on letting go, light, and space. Meditation should be about expanding and flowing (not grounding)
Alicia Cross is a Certified Personal Trainer, Accountability Coach, and Yoga Teacher with more than 19 years’ experience working with clients just like you. If you have questions, email Alicia@AliciaCrossTraining.com.
As an Amazon Associate I earn from qualifying purchases.
Kapha is one of the three Ayurvedic Doshas, or constitutions. The Kapha season is late Winter through early Spring (depending on where you’re at in the world). If you’re experiencing an imbalance of Kapha Dosha, or you want to eat for the season, here are some tips for you.
In general, favor bitter, pungent (spicy), and astringent foods. Limit sweet, sour (including fermented), and salty foods. Eat at the same time every day. Dinner should be a light meal no later than 7pm. Favor foods that are light, dry, and warming. Avoid snack and overeating.
Favor mung, adzuki, black, and pinto, navy, lima, and white beans, red and yellow lentils, black-eye peas, chick peas, split peas, tempeh, and cooked tofu
Avoid black and brown lentils, kidney beans, soy beans, soy milk, cold tofu
Nuts and Seeds
Favor pumpkin*, sunflower, flax and almonds
Avoid brazil nuts, cashews, macadamia, coconut, almonds, sesame, peanuts, pecans, pine nuts, pistachios, walnuts, sesame, hemp
White meat, poultry, eggs*, and freshwater fish are better choices. However, Ayurveda does not recommend consuming meat for anyone because it’s difficult to digest (physically and mentally)
Avoid beef, pork, chicken and turkey (dark), lamb, seafood, and saltwater fish
Alicia Cross is a Certified Personal Trainer, Accountability Coach, and Yoga Teacher with more than 19 years’ experience working with clients just like you. If you have questions, email Alicia@AliciaCrossTraining.com.
As an Amazon Associate I earn from qualifying purchases.
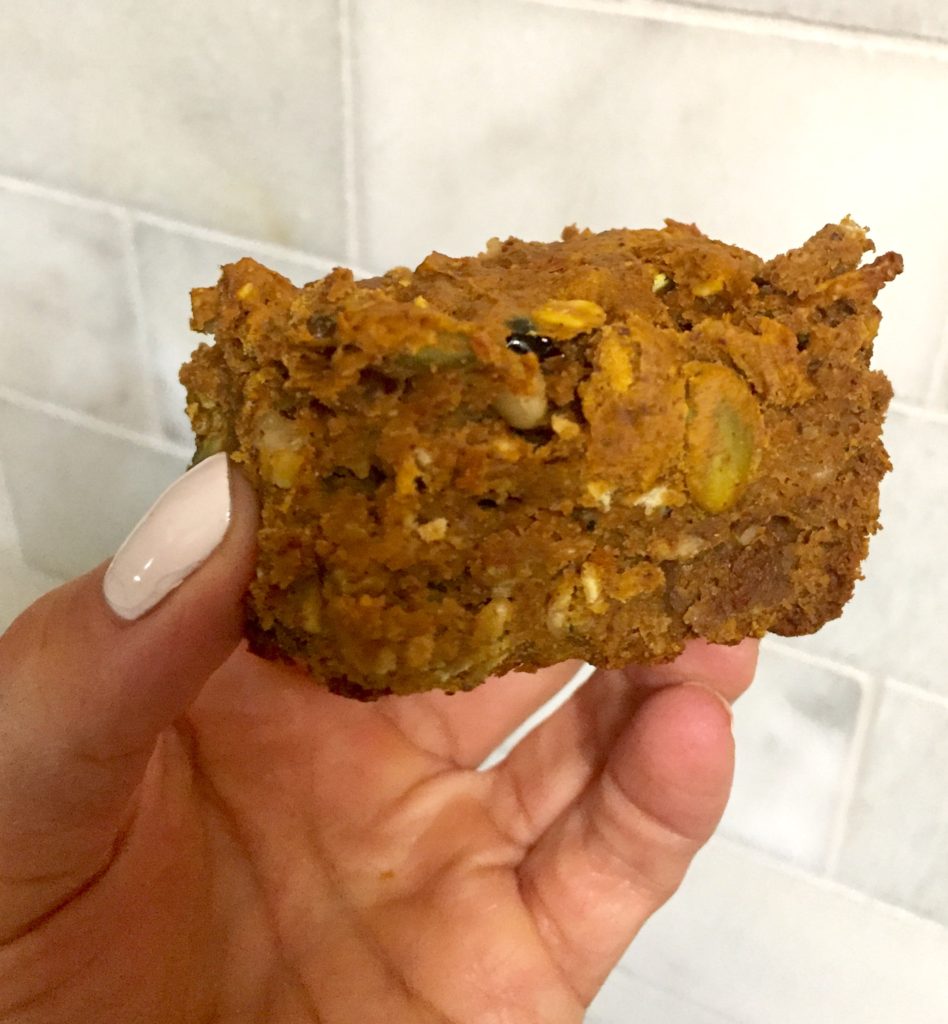
In a medium bowl, mix first 6 dry ingredients. In a large bowl, mix wet ingredients (syrup, pumpkin, almond butter, milk). Stir the dry ingredients into the wet ingredients. When combined, add in cranberries, nuts, and seeds.
Line a loaf pan or 8×8 glass Pyrex dish with parchment paper and spread batter evenly. Bake for 35-40 minutes or until toothpick inserted in the center comes out clean.
Let cool before cutting. Keep in the refrigerator.
Alicia Cross is a Certified Personal Trainer, Accountability Coach, and Yoga Teacher with more than 19 years’ experience working with clients just like you. If you have questions, email Alicia@AliciaCrossTraining.com.
As an Amazon Associate I earn from qualifying purchases.
You know you need a strong core. If your core is weak, something’s going to go wrong in your low back (or somewhere else is your body). And core training is so much more than just sit-ups or crunches. Your core training routine needs to address each of the 4 core movements AND the 4 anti-movements.
The 4 moments your core makes are:
1. Flexion: examples are Sit-Ups, Crunches, and Reverse Crunches
2. Extension: the best example is Cobra Lifts (not pushing through the hands)
3. Lateral Flexion (side bending): examples are Side Plank Hip Dips and Oblique Crunches over the core ball.
4. Rotation (twist): examples are Seated Abdominal Twists and Bicycle
But you can’t have a strong core if you’re not training the Anti-Movements.
Your core has 2 jobs: movement and stability. Stability is another word for anti-movement. You need your core to be strong enough to resist movement. For every movement, there’s anti-movement.
Here are the 4 core anti-movements:
1. Anti-Flexion:
Hip Hinge with the dowel (or a broom). Maintain the 3 points of contact (head, thoracic spine, and sacrum) and the 2 spaces (at the cervical and lumbar curves). Resist flexing the spine as you hinge at the hips.
V-Sit or Boat Pose
2. Anti-Extension:
Plank, Push-ups, Plank Leg Lifts, Alternate Spinal Balance aka Bird Dog
3. Anti-Lateral Flexion:
Side Plank Leg Lift, Pilates Side Kick Series on the Elbow
4.Anti-Rotation:
Plank Alternating Shoulder Taps, Clams, Pilates Leg Circles
Include the 4 core movements AND the anti-movements in your training routine if you want to have a strong core and happy, healthy back.
Alicia Cross is a Certified Personal Trainer, Accountability Coach, and Yoga Teacher with more than 19 years’ experience working with clients just like you. If you have questions, email Alicia@AliciaCrossTraining.com.
As an Amazon Associate I earn from qualifying purchases.
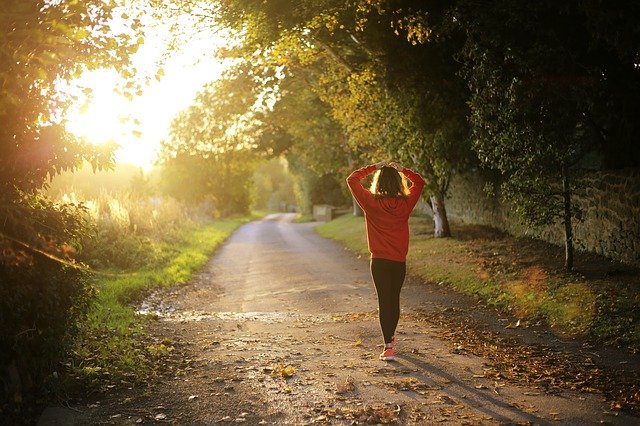
Taking your workouts outside this Fall and Winter? Here are 8 tips for exercising in cold weather:
1. Layer up and cover your head and hands. Wear a scarf or running mask to keep water vapor in. Base layer should be moisture wicking synthetic material or wool (not cotton). Second layer for warming, like fleece. Outer layer or shell, like a waterproof windbreaker for wind, rain, and snow. Take off layers as you warm up and replace them during the cool down.
3. If you’re out for a run, begin facing the wind and end with wind at your back.
4. Extend the warm-up and cool-down to 10-15 minutes each.
5. Colder temps will cause the breathing passages to narrow, making it harder to breathe. Keep this in mind and use RPE in addition to HR training zones.
6. Progress gradually (in intensity and duration) to allow the body time to acclimate.
7. Take off damp clothes right away when finished exercising.
8. Don’t forget sunglasses and sunscreen!
Keep in mind that cold weather will increase blood pressure. If you have hypertension, HR disease, diabetes, or obesity, you might be better opting for indoor exercise.
Alicia Cross is a Certified Personal Trainer, Accountability Coach, and Yoga Teacher with more than 19 years’ experience working with clients just like you. If you have questions, email Alicia@AliciaCrossTraining.com.
As an Amazon Associate I earn from qualifying purchases.
Hydration is a spectrum. Even if you’re not dehydrated, being chronically underhydrated is a problem.
All processes in the body require water. Water is needed to transport nutrients, eliminate waste, give form to cells, and lubricate joints. All your systems need waters: cardiovascular, renal, and endocrine (hormones).
Trying to lose weight?
People who drank 16oz of water burned 30% more calories at rest for 90 minutes.
Water loss:
You lose over 80oz of water daily as water vapor through respiration (this is why it’s important to breathe through your nose), insensible sweat, waste, sensible sweat. And you lose even more when sweating because of exertion (like during a tough workout) or in hot temps. The old myth of “eight 8oz glasses” isn’t cutting it and “half your bodyweight in ounces” isn’t even close.
So how much do you need:
The National Academy of Medicine suggests 125oz for males and 91oz for females. Obese individuals need even more. I suggest 100oz daily. If you’re hitting that, expect to urine hourly. That’s normal.
You cannot rely on thirst. If you’re thirsty, it’s too late, you’re already dehydrated.
Where is the water?
Your body mass is 50-60% water. Oil and water don’t mix: Water is NOT in fat. It’s stored in fat-free mass, like muscle tissue. As you age, if you’re not strength training (and eating properly), you’re losing muscles mass. That means you’re losing your storage system for water. That makes older adults more prone to dehydration.
Water is in cells, between cells, and in blood as plasma. Plasma is the highest priority. So when you sweat (which comes from blood plasma), your body “steals” water from your cells to replace it in plasma. That’s what causes dehydration.
Side Effects of Low Hydration:
If you’re down just 4%, you’re dehydrated. A loss of 1-3% and you’ll feel it physically and mentally. Your body “covers” for your chronic state low-hydration by creating a stress response. Your body has to increase cortisol to reabsorb water from urine. So being underhydrated contributes to the low-level chronic stress that is the cause of so many diseases.
Dehydration leads to an increase production of urea. Which comes from tissue breakdown. Drinking sufficient water is one way to maintain the muscle you worked so hard to earn at the gym.
Dehydration increases your risk for chronic disease like Type 2 Diabetes, kidney disease, and metabolic syndrome (belly fat, insulin resistance, high BP, and chronic inflammation). Other conditions associated with chronic low hydration: heart failure, vascular dementia, cognitive impairment, IBS, cancer, and premature death.
Water and your workouts:
If you’re working out while dehydrated, your endurance is lower, you’ll fatigue quicker, you’ll have less strength and power, your HR will be higher, and you’ll perceive the workout as bing harder than it is. That’s huge! If your workout feels hard and you’re not enjoying it or feeling successful, you’ll get less done or you might quit early. The broader implication is that you have no positive reinforcement to make the habit of exercise stick.
How to Hydrate:
Water is best! It’s absorbed in the small intestines. So if you’re drinking fruit juice (including coconut water) or sugary drinks, there’s more for your stomach to breakdown compared to plain water. That slows the process of getting the water to small intestines. Sports drinks should have no more than 2.5% carbohydrates. Drink no more than 20oz of fluid at a time.
Hydrate with 20oz of water 60-90 minutes before your workout. Drink water every 30 minutes post-workout.
Trainer’s Tips:
Drinking 100oz doesn’t happen by accident.
Log water using an app, record it in your planner, or track in the notes app on your phone.
Refill your bottle only when it’s empty for more accurate tracking.
Increase daily intake by 10-20oz at a time and work your way up to 100oz.
You have to start your day with water (tap water or hot lemon water before coffee).
Alicia Cross is a Certified Personal Trainer, Accountability Coach, and Yoga Teacher with more than 19 years’ experience working with clients just like you. If you have questions, email Alicia@AliciaCrossTraining.com.
As an Amazon Associate I earn from qualifying purchases.
Consistency is key! But what if you don’t have the energy to workout? If you’re staying on your workout routine, you will need active recovery days. While you’re taking a day (or up to a week to recover), It’s important to maintain the habit of daily exercise by showing up at the gym (or the living room gym) at the same time just as you would for your workout.
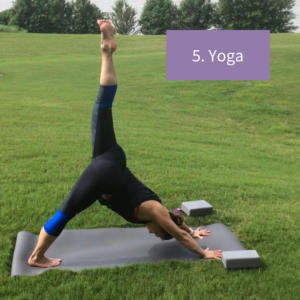
Instead of a killer workout, use the time for one of these:
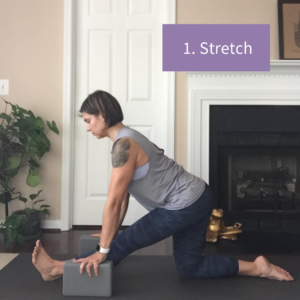
Stretch. You know you need to and you know you probably don’t do it enough. So have a 30-60 minute full body stretch sesh.
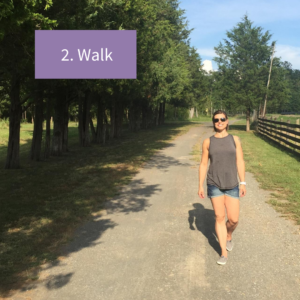
Go for a walk, either outside or on the treadmill. If you’re already getting a 30-minute daily walk, make this a long one. Aim for 60ish minutes.
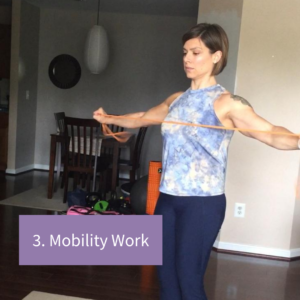
Mobility work. Grab your bands and work on your shoulders, ankles, wrists, hips, or whatever area needs it.
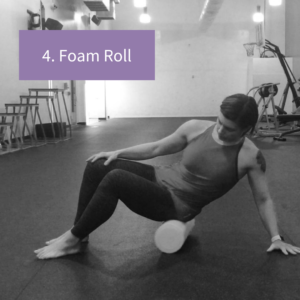
Foam Roll. Give yourself a full body massage with a foam roller, the stick, LAX balls, and any other self-myofascial release tools you’ve been collecting.
Alicia Cross is a Certified Personal Trainer, Accountability Coach, and Yoga Teacher with more than 18 years’ experience working with clients just like you. If you have questions, email Alicia@AliciaCrossTraining.com.
Feeling like you’re always sore or not recovering? Here’s how to recover from your workouts:
Start with the Basics
1. Sleep: The harder you work, the more sleep you need in the 7.5 to 9.5 hour range.
2. Hydration: Drink 100oz of water daily or more if you’re a heavy sweater and/or exercising outdoors. You might also need electrolytes in addition to plain water. I use ConcenTrace Mineral Drops and Ultima Electrolytes.
3. Healthy Nutrition: Eliminate ultra-processed foods and eat more protein, colorful vegetables, healthy fats, and complex carbs.
4. Rest & Recover: Don’t work the same muscles groups on consecutive days. But do keep moving daily. Take a deload week. Stretch and/or perform self-myofascial release (ie foam rolling) after every workout.
5. Variety: Vary intensity (weight) and volume (reps and sets).
6. Manage Life Stress: With yoga, meditation, journaling, etc.
Supplements
I’ll share supplements I take for recovery. Remember to do your own research (which may include speaking to your health care provider) before adding supplements to your routine.
Alicia Cross is a Certified Personal Trainer, Accountability Coach, and Yoga Teacher with more than 18 years’ experience working with clients just like you. If you have questions, email Alicia@AliciaCrossTraining.com.
As an Amazon Associate I earn from qualifying purchases.
Do your mind and body feel fatigued after sitting at your computer all day?
Did you know you can do Yoga at your desk?
Check out these quick, simple Chair Yoga practices that will ease tension in your body and refresh your mind in under 10 minutes!
Begin with Belly Breathing:
Push back away from your desk and sit up tall in your chair. Rest one hand on the belly and one hand on the chest. Breathe in and out through the nose. Notice which hand is feeling the movement as you breathe. If there’s a lot of upward movement in your chest, start to shift that movement down into the belly. Inhale and expand the belly. Exhale and let the belly move back toward the spine. Inhale and expand, keeping the chest still. Exhale and let the belly come back toward the spine. Inhale fill the belly with air. Exhale relax and soften.
Next, stretch your neck and shoulders:
Roll the shoulders to the front a few times. And then roll them to the back. Lean the head to the right side, left hand resting in your lap or reaching down by your side. Next, turn the gaze slight down to the right corner. Lastly, dip your chin toward the right collar bone.
Come back to center and retract your chin like your trying to press the back of your head into the wall behind your. Repeat on the left side. Finally, come back to neutral and lower the chin to the center of the chest with both hands reaching to the ground on either side of your chair. Bring the head back up and roll the shoulders up, back, and down one more time.
Let’s get the spine moving:
Step your feet a bit wider than hip distance for cat/cow. Inhale, arch the spine and look up. Exhale, round the spine and drop the head. Repeat for 2-3 rounds of breath.
Come back to neutral. Inhale tall and exhale rotate to the right. Inhale to the center. Exhale and rotate the left. Repeat for 2-4 rounds of breathe.
Come back to the center and exhale to lean over to the right. Inhale center and exhale lean over to the left. For lateral flexion, you can keep both arms down or reach the top arm up and over. Keep the hips equally rooted in the seat.
Lastly, stretch those hips:
Cross your right ankle over your left knee for Figure 4 stretch. Flex your foot, sit up tall, and hinge forward slightly to increase the stretch. If you want to decrease the stretch, lean back in your chair.
Release and pivot to the left to lunge in your chair. Hold on the back of the chair for stability. If you’d like to feel a deeper stretch in the front of the thigh, pull the back foot in.
Release and repeat both stretches on the left side. Come back to center and notice how you feel!
Alicia Cross is a Certified Personal Trainer, Accountability Coach, and Yoga Teacher with more than 18 years’ experience working with clients just like you. If you have questions, email Alicia@AliciaCrossTraining.com.
As an Amazon Associate I earn from qualifying purchases.
Horizontal Pulling needs to be priority No. 1 in your upper body routine.
This movement works your back and balances overworked, tight muscles in the chest and front of the shoulders. These exercises also help improve your posture and can ease pain and tension caused from working at the computer for hours on end.
You have to have some kind of equipment to work these muscles. Here are 3 options with different equipment:
TRX High Row: Keep the elbows high and the shoulders down away from your ears. This exercise looks like your elbowing someone in the face behind you, only in slow motion. Get your TRX here.
Single Arm DB Row: Prop yourself up with your forearm on your front thigh or rest your hand on a bench or box. Keep the arm in close to your torso as you row.
Palm Up Band Row: Loop the band around your feet or anything sturdy. Really focus on squeezing the bottoms of the shoulder blades together and keeping the shoulders down away from your ears. This is similar to the DB row but the palms are facing up. Get your bands here.
If you spend a lot of time working on the computer, if you have pain in your neck or upper back, or if your posture needs improvement, do all of these exercises twice per week, 3 sets of 12-20 repetitions.
2. Vertical Pull
Pulling movements work your back. You have to have some kind of equipment to work these muscles. Here are a few options for Vertical Pulling at home if you don’t have a pull up bar or a Lat Pull-Down machine:
TRX Pull Ups: Do these with palms facing in or away. Get your TRX here.
Lat Pull-Over w/a Weight: Keep your ribs pinned to the ground beneath you as each the weight overhead with straight arms. Pull the weight back overhead.
Supine Lat Pull-Over w/a Band: Loop band around somethings sturdy (like the couch leg) and just like the Lat Pull over with a weight, keep ribs pinned to the ground and arms straight as you move. Get your Thera Bands here.
Supine Lat Pull-Down w/a Band: Loop band around something sturdy and pull elbows down to hips. Get your bands here.
Banded Straight Arm Lat Pull: Anchor the band overhead and pull with straight arms. Here I’m using the TRX door anchor to attach the band overhead. Get your band anchor here.
Banded Lat Pull Down: Anchor the band overhead and pull with bent elbows. Here I’m using the TRX door anchor to attach the band overhead.
Do 1-2 of these exercises twice per week, 3 sets of 12-20 repetitions.
3. Vertical Press/Push
DB OH Press (palm facing forward): If you have issues with shoulder mobility, do this exercise with palms facing forward and elbows out to the sides.
DB OH Press (palms facing in): If you’re shoulders will allow it, do this exercise with elbows in front of shoulders and palms facing in.
A variation I’m loving right now is adding a mini band around the forearms. Push into the band as you press DB’s OH and you will really feel your shoulders burning! Get your mini-bands here.
Band OH Press: Hold a monster band a little wider than shoulder distance apart and stand on it with 1 or both feet. Flip the band up to your collar bones so that the elbows are inside the band. You’ll get bonus core work with these! Get your monster bands here.
Modified Handstand Push up: And if you don’t have any weights or bands at home, you can still work on vertical pressing with Modified Handstand Push Ups: Elevate your feet and place your hands on the ground a little wider than shoulder distance apart. Remember to keep your hips up high so you’re working that overhead pressing motion. These are tough!
Do 1 of these exercises 1-2 times per week, 3 sets of 12-20 repetitions.
3. Horizontal Press/Push
You’re probably already doing a lot of these because you don’t need any equipment to do a push up. And push ups are a staple in strength training routines and body weight workouts. Add to that all the planks and Chatarungas you’re doing in Pilates and Yoga, and that’s a lot of horizontal pushing! If you want to mix it up and you have equipment try one of these variations:
TRX Chest Press: The closer your feet are to the anchor, the harder this exercise is. This is a great way to modified pushups and still be on your toes. Get your TRX here.
DB Chest Press: This exercise is great because each arm has to do its own work. If one side is stronger than the other, it can take over in push ups. But not here!
Band Press: This is a great option if getting down on the floor is challenging. You can even do this sitting in a chair, which makes it great for seniors. Get your bands here.
If push ups are already part of your routine, add another variation once per week, 3 sets of 12-20 repetitions.
Alicia Cross is a Certified Personal Trainer, Accountability Coach, and Yoga Teacher with more than 18 years’ experience working with clients just like you. If you have questions, email Alicia@AliciaCrossTraining.com.
As an Amazon Associate I earn from qualifying purchases.